
In the world of modern web development, building reusable and flexible components is crucial. Angular, provides a powerful feature known as ng-content to achieve this. This feature allows developers to project content from a parent component into a child component, making it easier to create dynamic and customizable components. In this blog post, we'll explore what ng-content is, how it works, and how you can use it to enhance your Angular applications.
What is ng-content?
ng-content is an Angular directive used for content projection, which is a technique that enables you to insert content from a parent component into a child component. This is particularly useful for creating reusable components where the content inside the component can be defined by the parent component.
How Does ng-content Work?
When you use ng-content in a child component, it acts as a placeholder. During runtime, Angular replaces this placeholder with the content passed from the parent component. This mechanism allows for greater flexibility and reusability of components.
Basic Usage of ng-content
Let’s start with a simple example to understand the basic usage of ng-content.
Child Component (alert.component.html)
<div class="alert">
  <ng-content />
</div>
Parent Component (app.component.html)
<app-alert>
  <p>This is an important alert message!</p>
</app-alert>
In this example, the <ng-content /> tag in the alert.component.html acts as a placeholder. The content within the
<div class="alert">
  <p>This is an important alert message! </p>
</div>
Multiple content placeholders with fallback ng-content
Angular also allows for more complex content projection using named slots (select attiribute). Named slots enable you to define multiple placeholders within a single component, each of which can be filled with different content from the parent component.
Child Component (card.component.html)
<div class="card">
  <ng-content select="card-header"></ng-content>
  <ng-content select="card-content"></ng-content>
  <ng-content select="card-footer"></ng-content>
</div>
Parent Component (app.component.html)
<app-card>
  <card-header>
    <h2>Header Content</h2>
  </card-header>
  <card-content>
    <p>This is the main content of the card.</p>
  </card-content>
  <card-footer>
    <button>Footer Button</button>
  </card-footer>
</app-card>
Selector tags will determine where the content gets projected.
In this example card-header will project header content to select="card-header" in the child component.
Angular also can fallback to a default <ng-content> </ng-content> if it cannot find a matching select attribute to project the content on from its parent.
Something like this
Child Component (card.component.html)
<div class="card">
  <ng-content select="card-header"></ng-content>
  <ng-content select="card-content"></ng-content>
  <ng-content select="card-footer"></ng-content>
  <!-- capture anything except "card-header, card-content and card-footer" -->
  <ng-content></ng-content>
</div>
Parent Component (app.component.html)
<app-card>
  <card-header>
    <h2>Header Content</h2>
  </card-header>
  <card-content>
    <p>This is the main content of the card.</p>
  </card-content>
  <card-footer>
    <button>Footer Button</button>
  </card-footer>
  <p>This will be projected into default ng content in the child</p>
</app-card>
While all these were simple use cases of ng-content promoting re-usability, the true potential of ng-content is exposed when it is used with ng-template.
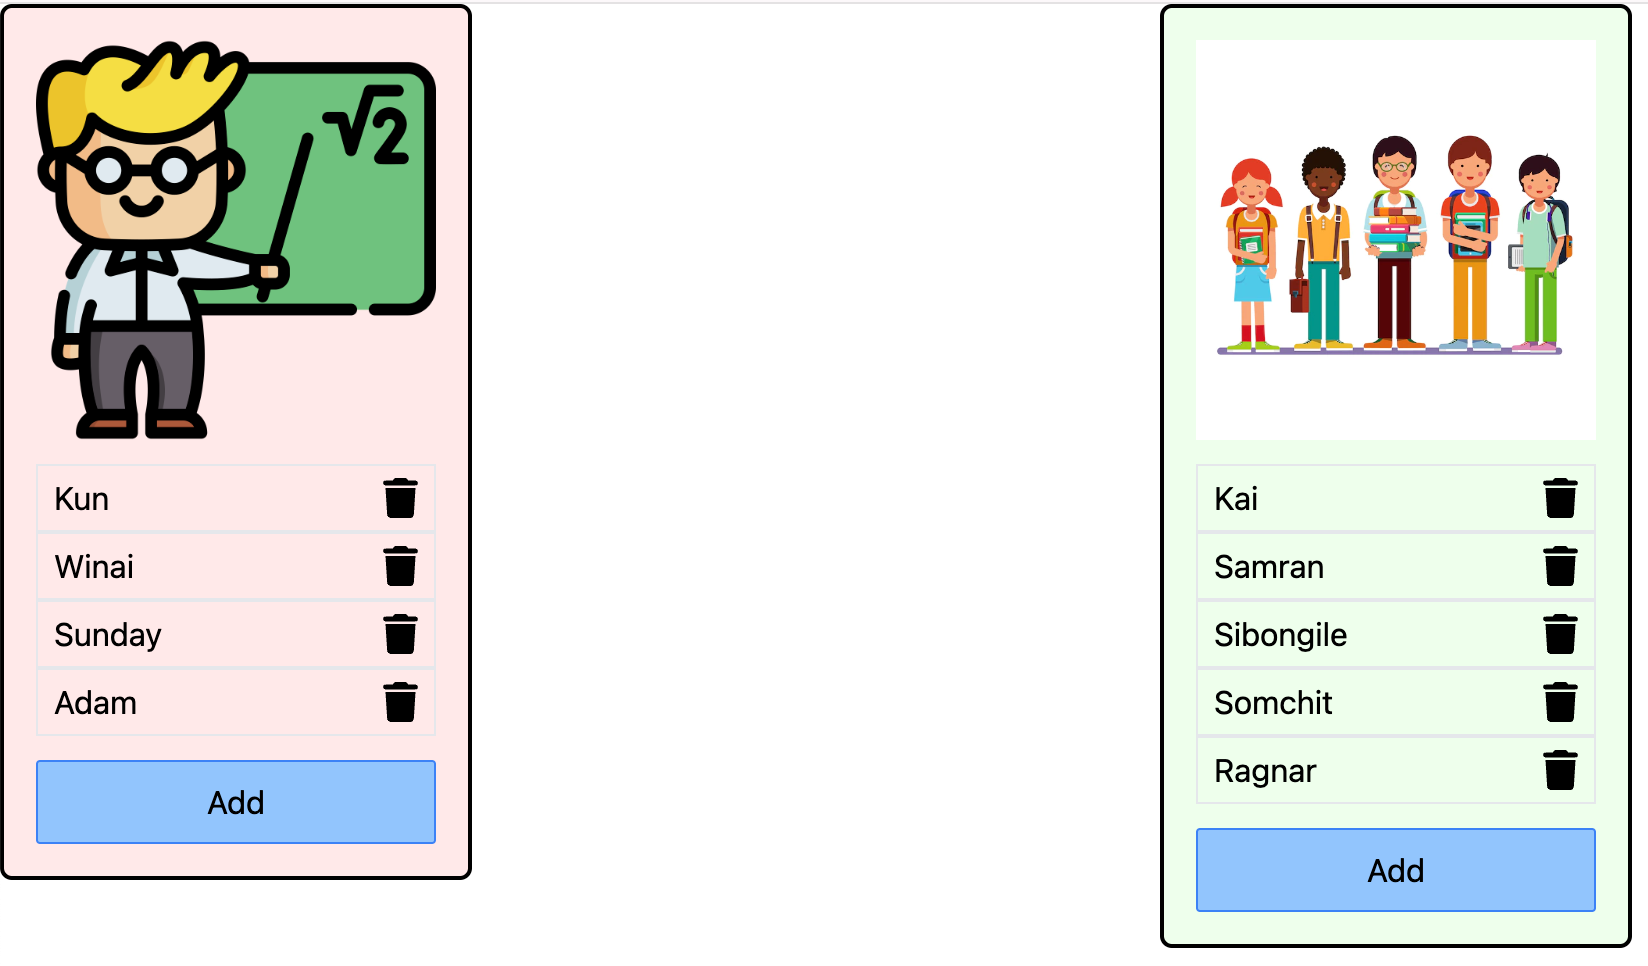
In the following scenario there exists a card component which can show data of a student as well as a teacher. Let’s explore how we can re-use the same card component for showing the details of the teacher or the student without using conditionals blocks like @if.
Let’s first see the student component.
student-card.component.ts
import { AsyncPipe } from '@angular/common';
import { ChangeDetectionStrategy, Component, inject } from '@angular/core';
import {
  FakeHttpService,
  randStudent,
} from '../../data-access/fake-http.service';
import { StudentStore } from '../../data-access/student.store';
import { CardComponent } from '../../ui/card/card.component';
import { ListItemComponent } from '../../ui/list-item/list-item.component';

@Component({
  selector: 'app-student-card',
  template: `
    <app-card [items]="students()" (add)="addStudent()" class="bg-light-green">
      <img src="assets/img/student.webp" width="200px" />
      <ng-template #rowRef [cardRow]="students()" let-student>
        <app-list-item (delete)="deleteStudent(student.id)">
          {{ student.firstName }}
        </app-list-item>
      </ng-template>
    </app-card>
  `,
  standalone: true,
  styles: [
    `
      .bg-light-green {
        background-color: rgba(0, 250, 0, 0.1);
      }
    `,
  ],
  imports: [CardComponent, ListItemComponent, AsyncPipe],
  changeDetection: ChangeDetectionStrategy.OnPush,
})
export class StudentCardComponent {
  private http = inject(FakeHttpService);
  private store = inject(StudentStore);

  students = this.store.students;

  constructor() {
    this.http.fetchStudents$.subscribe((s) => this.store.addAll(s));
  }

  addStudent() {
    this.store.addOne(randStudent());
  }

  deleteStudent(id: number) {
    this.store.deleteOne(id);
  }
}
Now let’s see the teacher component.
teacher-card.component.ts
import { AsyncPipe } from '@angular/common';
import { ChangeDetectionStrategy, Component, inject } from '@angular/core';
import {
  FakeHttpService,
  randTeacher,
} from '../../data-access/fake-http.service';
import { TeacherStore } from '../../data-access/teacher.store';
import { CardComponent } from '../../ui/card/card.component';
import { ListItemComponent } from '../../ui/list-item/list-item.component';

@Component({
  selector: 'app-teacher-card',
  template: `
    <app-card [items]="teachers()" class="bg-light-red" (add)="addTeacher()">
      <img src="assets/img/teacher.png" width="200px" />
      <ng-template #rowRef [cardRow]="teachers()" let-teacher>
        <app-list-item (delete)="deleteTeacher(teacher.id)">
          {{ teacher.firstName }}
        </app-list-item>
      </ng-template>
    </app-card>
  `,
  styles: [
    `
      .bg-light-red {
        background-color: rgba(250, 0, 0, 0.1);
      }
    `,
  ],
  standalone: true,
  imports: [ListItemComponent, AsyncPipe, CardComponent],
  changeDetection: ChangeDetectionStrategy.OnPush,
})
export class TeacherCardComponent {
  private http = inject(FakeHttpService);
  private store = inject(TeacherStore);

  teachers = this.store.teachers;

  constructor() {
    this.http.fetchTeachers$.subscribe((t) => this.store.addAll(t));
  }

  addTeacher() {
    this.store.addOne(randTeacher());
  }

  deleteTeacher(id: number) {
    this.store.deleteOne(id);
  }
}
The interesting thing to notice here is the #rowRef (template reference). We will read the reference in the child component.
Here is the child component which is card component.
app-card.component.ts
import { NgTemplateOutlet } from '@angular/common';
    import {
  ChangeDetectionStrategy,
  Component,
  contentChild,
  input,
  output,
  TemplateRef,
} from '@angular/core';

@Component({
  selector: 'app-card',
  template: `
    <ng-content select="img" />

    <section>
      @for (item of items(); track item.id) {
        <ng-template
          [ngTemplateOutlet]="rowTemplate()!"
          [ngTemplateOutletContext]="{ $implicit: item }"></ng-template>
      }
    </section>

    <button
      class="rounded-sm border border-blue-500 bg-blue-300 p-2"
      (click)="add.emit()">
      Add
    </button>
  `,
  standalone: true,
  imports: [NgTemplateOutlet],
  host: {
    class: 'border-2 border-black rounded-md p-4 w-fit flex flex-col gap-3',
  },
  changeDetection: ChangeDetectionStrategy.OnPush,
})
export class CardComponent<T extends { id: number }> {
  items = input.required<T[]>();
  add = output();
  rowTemplate = contentChild<TemplateRef<unknown>>('rowRef'); // Signal<ElementRef|undefined>
}
Notice how the projected content from student card component and teacher card component is accessed via contentChild. In this case we get access to the template ‘rowRef’ passed from parent components.
In this way we can show either the content of the teacher or the content of the student without passing @if and introducing any additional components or variables.
Here is a link to the final application. Please use this to get an idea of the overall implementation.
Project Link
Artcile inspired by challenge here.
https://angular-challenges.vercel.app/challenges/angular/1-projection/
Some more advanced reading.
MDN Docs