

Writing clear and reusable code is an integral part of programming. One of the many tools that Angular offers for developing complex applications is the Directive Composition API. This feature facilitates writing of reusable and maintainable code. In this article, we will explore what the Directive Composition API is, how the hostDirective option works, and how to successfully use this capability in your Angular projects.
Introduction
Angular Directives are classes that add additional behaviour to HTML elements in your applications. Thanks to the hostDirective option, developers can manage directives more efficiently and maintainable.
Official documentation about Directive Composition API you can find under this link.
In this article, we will cover:
- What is the Directive Composition API?
- Understanding the
hostDirectiveoption - Practical example
- Host directive semantics
- Best Practices and Tips
What is Directive composition API?
Directive composition API lets you apply directives to a component's host element from within the component's TypeScript class. Thanks to that feature, we can create logic in separated directives and combine them into components.
Understanding the hostDirective option
The option is available in angular components and directives. This provides the ability to declare and reuse business logic that can be used in multiple places.
You apply directives to a component by adding a hostDirectives property to a component's decorator.
@Directive({
    // ...
    hostDirectives: [UserDirective]
})
Directives used in hostDirectives must be Standalone. I.e., they should have standalone: true set in their decorator metadata.
For the following code, let's assume that one of UserDirective's tasks is to look for a button in the template to emit userRemoved on a click event in the user card.
@Directive({standalone: true})
export class UserDirective implements AfterViewInit {
    userId = input.required<number>();
    userRemoved = output<number>();

    private elementRef = inject(ElementRef);
    private destroyRef = inject(DestroyRef);

    ngAfterViewInit() {
        this.userRemoveListener();
    }

    private userRemoveListener() {
        const removeButton =
            this.elementRef.nativeElement.querySelector('button.user-remove');

        if (!removeButton) return;

        const listener$ = fromEvent(removeButton, 'click');
        listener$
            .pipe(
                takeUntilDestroyed(this.destroyRef) // unsubscribe on destroy
            )
            .subscribe(() => this.userRemoved.emit(this.userId()));
    }

    // ...
}
You can explicitly include inputs and outputs in your component's API by expanding the entry in
@Component({
    selector: 'user-cart',
    template: `
      <button class="user-remove">X</button>
      ...
    `,
    standalone: true,
-   hostDirectives: [UserDirective]
+   hostDirectives: [
+       {
+           directive: UserDirective,
+           inputs: ['userId'],
+           outputs: ['userRemoved'],
+       },
+   ],
})
<user-cart [userId]="user.id" (userRemoved)="removeUser($event)"/>In this way, we can pass data and interactions to our directive through our host.
Also, there is a way to use aliases. After declaring our input or output, we can mark our alias after the colon
@Component({
    selector: 'user-cart',
    template: `
      <button class="user-remove">X</button>
      ...
    `,
    standalone: true,
    hostDirectives: [{
        directive: UserDirective,
+       inputs: ['userId: id'],
+       outputs: ['userRemoved: removed'],
    }]
})
export class UserCartComponent {}
<user-cart [id]="user.id" (removed)="removeUser($event)"/>Practical example
You may also find a demo app of the following code in this link.
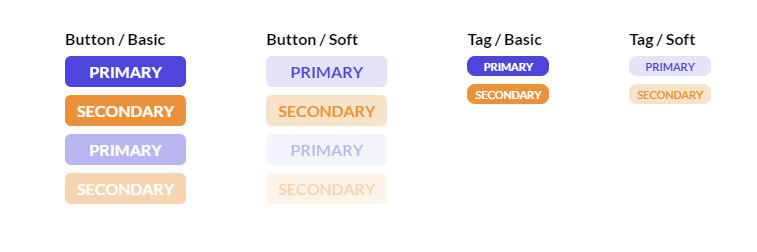
We have buttons and tag components.
Button - Component
This is how our component logic looks like.
@Component({
    selector: 'app-btn',
    template: `<button><ng-content /></button>`,
    styleUrls: ['./button.component.scss'],
    standalone: true,
    changeDetection: ChangeDetectionStrategy.OnPush,
})
export class ButtonComponent {
    type = input<'basic' | 'soft'>('basic');
    variant = input<'primary' | 'secondary'>('primary');

    @HostBinding('class')
    get hostClass(): string {
        return [this.type(), this.variant()].join(' ');
    }
}
Tag - Component
@Component({
    selector: 'app-tag',
    template: `<small><ng-content /></small>`,
    styleUrls: ['./tag.component.scss'],
    standalone: true,
    changeDetection: ChangeDetectionStrategy.OnPush,
})
export class TagComponent {
    type = input<'basic' | 'soft'>('basic');
    variant = input<'primary' | 'secondary'>('primary');

    @HostBinding('class')
    get hostClass(): string {
        return [this.type(), this.variant()].join(' ');
    }
}
Also, a directive used on buttons.
Disabled - Directive
@Directive({
    selector: '[appBtnDisabled]',
    standalone: true,
})
export class BtnDisabledDirective {
    disabled = input(false, {
        transform: booleanAttribute,
        alias: 'appBtnDisabled', // data pass by selector
    });

    @HostBinding('attr.disabled')
    get isabledAttr(): '' | null {
        return this.disabled() ? '' : null;
    }

    @HostBinding('class.disabled')
    get disabledClass(): boolean {
        return this.disabled();
    }

    @HostListener('click', ['$event'])
    @HostListener('dbclick', ['$event'])
    onClick(event: Event): void {
        if (this.disabled() === false) return;
        event.preventDefault();
        event.stopImmediatePropagation();
    }
}
And we can use these components as follows:
<strong>Button / Basic</strong>
<app-btn>primary</app-btn>
<app-btn variant="secondary">secondary</app-btn>
<app-btn appBtnDisabled>primary</app-btn>
<app-btn variant="secondary" appBtnDisabled>secondary</app-btn>

<strong>Button / Soft</strong>
<app-btn type="soft">primary</app-btn>
<app-btn type="soft" variant="secondary">secondary</app-btn>
<app-btn type="soft" appBtnDisabled>primary</app-btn>
<app-btn type="soft" variant="secondary" appBtnDisabled>secondary</app-btn>

<strong>Tag / Basic</strong>
<app-tag>primary</app-tag>
<app-tag variant="secondary">secondary</app-tag>

<strong>Tag / Soft</strong>
<app-tag type="soft">primary</app-tag>
<app-tag type="soft" variant="secondary">secondary</app-tag>
Everything works fine, but there are some issues with that code:
- We have duplicated code between button and tag components.
- Nothing prevents us from imposing a
BtnDisabledDirectiveon our component tag. And we would like to avoid such a scenario. - For better accessibility, we should apply
disabledvalue forbuttontag
Let's improve this code a bit!
How to use hostDirective
To begin with, let's start by creating directives to handle the type & variant appearance of components
TypeAppearanceDirective
// Selector is optional, in that case we don't need them
@Directive({standalone: true})
export class TypeAppearanceDirective {
    type = input<'basic' | 'soft'>('basic');

    @HostBinding('class')
    get hostClass(): string {
        return this.type();
    }
}
VariantAppearanceDirective
// Selector is optional, in that case we don't need them
@Directive({standalone: true})
export class VariantAppearanceDirective {
    variant = input<'primary' | 'secondary'>('primary');

    @HostBinding('class')
    get hostClass(): string {
        return this.variant();
    }
}
TypeAppearanceDirective and VariantAppearanceDirective could be combined into one directive. So let's create this directive.
AppearanceDirective
// Selector is optional, in that case we don't need them
@Directive({
    standalone: true,
    hostDirectives: [
        {
            directive: TypeAppearanceDirective,
            inputs: ['type'], // declare inputs
        },
        {
            directive: VariantAppearanceDirective,
            inputs: ['variant'], // declare inputs
        },
    ],
})
export class AppearanceDirective {}
Declared inputs in AppearanceDirective will be also available in a component, so we don't need to pass them again in our component, we just need to load our directive.
AppearanceDirective should be declared into ButtonComponent and TagComponent. But BtnDisabledDirective has to be declared only in ButtonComponent.
Also, we want to use disabled alias for appBtnDisabled.
There also is a way to inject values into our host. In ButtonComponent we should also provide disabled value into native button, by disabled signal property included in BtnDisabledDirective, let's mark our injection
Let's also mark our inject as self to inform the Angular that should only look for a value that is bound on the component injector.
After small changes, we should have refactored code:
ButtonComponent
@Component({
    selector: 'app-btn',
+   template: `<button [disabled]="disabled()" ><ng-content /></button>`,
    styleUrls: ['./button.component.scss'],
    standalone: true,
    changeDetection: ChangeDetectionStrategy.OnPush,
+   hostDirectives: [
+       AppearanceDirective, // 'inputs' are declared inside directive
+       {
+           directive: BtnDisabledDirective,
+           inputs: ['appBtnDisabled: disabled'],
+       },
+   ],
})
export class ButtonComponent {
+   disabled = inject(BtnDisabledDirective, { self: true }).disabled;
-   type = input<'basic' | 'soft'>('basic');
-   variant = input<'primary' | 'secondary'>('primary');
-
-   @HostBinding('class')
-   get hostClass(): string {
-       return [this.type(), this.variant()].join(' ');
-   }
}
TagComponent
@Component({
    selector: 'app-tag',
    template: `<small><ng-content /></small>`,
    styleUrls: ['./tag.component.scss'],
    standalone: true,
    changeDetection: ChangeDetectionStrategy.OnPush,
+   hostDirectives: [
+     AppearanceDirective, // 'inputs' are declared inside directive
+   ],
})
export class TagComponent {
-   type = input<'basic' | 'soft'>('basic');
-   variant = input<'primary' | 'secondary'>('primary');
-
-   @HostBinding('class')
-   get hostClass(): string {
-       return [this.type(), this.variant()].join(' ');
-   }
}
and now we are using these components like this
<strong>Button / Basic</strong>
<app-btn>primary</app-btn>
<app-btn variant="secondary">secondary</app-btn>
-<app-btn appBtnDisabled>primary</app-btn>
+<app-btn disabled>primary</app-btn>
-<app-btn variant="secondary" appBtnDisabled>secondary</app-btn>
+<app-btn variant="secondary" disabled>secondary</app-btn>

<strong>Button / Soft</strong>
<app-btn type="soft">primary</app-btn>
<app-btn type="soft" variant="secondary">secondary</app-btn>
-<app-btn type="soft" appBtnDisabled>primary</app-btn>
+<app-btn type="soft" disabled>primary</app-btn>
-<app-btn type="soft" variant="secondary" appBtnDisabled>secondary</app-btn>
+<app-btn type="soft" variant="secondary" disabled>secondary</app-btn>

<strong>Tag / Basic</strong>
<app-tag>primary</app-tag>
<app-tag variant="secondary">secondary</app-tag>

<strong>Tag / Soft</strong>
<app-tag type="soft">primary</app-tag>
<app-tag type="soft" variant="secondary">secondary</app-tag>
The disabled input is now an integral part of ButtonComponent and we don't need to import BtnDisabledDirective in TagComponent.
Host directive semantics
Directives execution order
Host directives just as the other components and directives have the same lifecycle used directly in a template. Remember, host directives always execute their constructor, lifecycle hooks, and bindings before the host.
It is important to keep this in mind to be sure and know how to avoid causing our application's performance to suffer. Based on our example with the button component
@Directive({
    standalone: true,
    hostDirectives: [
        {
            directive: TypeAppearanceDirective,
            inputs: ['type'],
        },
        {
            directive: VariantAppearanceDirective,
            inputs: ['variant'],
        },
    ],
})
export class AppearanceDirective {}

@Component({
    selector: 'app-btn',
    template: `<button><ng-content /></button>`,
    styleUrls: ['./button.component.scss'],
    standalone: true,
    changeDetection: ChangeDetectionStrategy.OnPush,
    hostDirectives: [
        AppearanceDirective,
        {
            directive: BtnDisabledDirective,
            inputs: ['appBtnDisabled: disabled'],
        },
    ],
})
export class ButtonComponent {
    // ...
}
the order of execution will look like this:
TypeAppearanceDirectiveinstantiatedVariantAppearanceDirectiveinstantiatedAppearanceDirectiveinstantiatedBtnDisabledDirectiveinstantiatedButtonComponentinstantiatedTypeAppearanceDirectivelifecycle hooksVariantAppearanceDirectivelifecycle hooksAppearanceDirectivelifecycle hooksBtnDisabledDirectivelifecycle hooksButtonComponentlifecycle hooksTypeAppearanceDirectiveapplies host bindingsVariantAppearanceDirectiveapplies host bindingsAppearanceDirectiveapplies host bindingsBtnDisabledDirectiveapplies host bindingsButtonComponentapplies host bindings
As you can see, that the component and host directives create a new instance each time. In this case, their number is 5, so to maintain good performance of our application, we should not abuse this functionality and implement logic that does not require a lot of computing power.
Dependency injection
Host can inject the instances of host directives that specify hostDirectives, and vice versa.
Again, based on the example with ButtonComponent, we just need to define our Dependency injection by class.
@Component({
    selector: 'app-btn',
    template: `<button [disabled]="disabled()" ><ng-content /></button>`,
    styleUrls: ['./button.component.scss'],
    standalone: true,
    changeDetection: ChangeDetectionStrategy.OnPush,
    hostDirectives: [
        // ...
        {
            directive: BtnDisabledDirective,
            inputs: ['appBtnDisabled: disabled'],
        },
    ],
})
export class ButtonComponent {
    disabled = inject(BtnDisabledDirective, {self: true}).disabled
}
The providers provided by class with hostDirectives take precedence over providers defined by the host directives if a host with hostDirectives and those host directives both supply the same injection token.
Best Practices and Tips
selectorproperty is an optional option in directives. If we want to implement directives only in thehostDirectivesoption, we do not need to pass this parameter.- Angular detects whether our directive contains the declared elements in
inputsandoutputsso we will be notified if there is a bad implementation. - Use
selfflag whileinjectingdirective into host.
Summary
The Directive Composition API in Angular offers a way to write reusable and maintainable code. This makes it easy for us to follow the "Don't repeat yourself" (DRY) principle. However, keep in mind how the code works under the hood to avoid performance problems.