

Angular 15 introduced a killer feature that is often overlooked — Directive Composition API. It adds a new property to the Directive/Component decorator called hostDirectives. In it, you can list all standalone directives that you want automatically applied to your component or directive. This effectively allows you to bundle decomposed logic any way you like. It opens up many doors and I feel is quite underappreciated by the community as well as the Angular team themselves — you will only find it used ONCE in the entire components repository at the time of writing. That is probably the reason for the caveats this feature has and we will discuss them below. But not before we explore how ridiculously powerful it is! So our plan is:
- Overview of the feature
- Why is it important (case study: Taiga UI)
- Examples of usage
- Caveats and how to deal with them
Let's go!
Overview
Host directives are listed as an array of directives or objects that have the directive class and all inputs/outputs that you want exposed on your host. A mental model I like to have regarding this feature is that it is something like providers on steroids. Previously we also could decompose some logic into services and add them to providers. Let's name key differences:
- Providers are lazy — they have to be injected somewhere to be instantiated. Sometimes that's good, sometimes it's not. In that regard we can view host directives as autoinitialized providers.
- Providers do not have access to the host, other than through
ElementRef. Host directives, on the other hand, are directives, just like any other. Therefore, they can havehostin their decorator and apply host listeners and bindings declaratively which is a big plus. - Providers can only be configured with DI, whereas host directives can expose inputs, making them much easier to work with when decomposition requires external configuration.
Keeping these things in mind we see that we can achieve much more with host directives. Besides, they can just as well be used on their own in templates. I'm a huge fan of decomposition and this API provides me with tools that can substantially improve my code base. It might not be clear from the get go, but once we take a closer look at the examples I'm sure you would see how important it is.
My area of expertise lies in reusable flexible low level UI components. I'm really excited about Directive Composition API because it can help me a lot. This might not be the case if you mostly work on business logic components.
Taiga UI
Like I said at the beginning, even though this feature was introduced in Angular 15, it did not yet garner attention it deserves. None of the big libraries use it — Material, ng-zorro, PrimeNG, Bootstrap. I worked on reusable UI blocks for over 5 years and was very excited when Directive Composition API finally shipped. With this article I hope to spark more interest in Angular community, showcasing what you can do with it in a tidy, ergonomic way.
The best place to go for examples that I know of is the library my team developed called Taiga UI. Recently we made a huge refactor for the next major version, where we bumped Angular to 16 and finally unlocked this feature. And boy did we run wild with it! You can search the source code and see it is used about 50 times currently. So what have we learned throughout our refactor? Let's find out.
Component is a valuable slot
You can have multiple directives on one element, but only one component. Before Directive Composition API if you wanted to apply multiple directives — you would have to have a component. Imagine you need a dropdown applied to a button with some visual styles and maybe open/close logic. All of those things are coming from directives. So you would have a component:
<my-custom-dropdown [content]="content">
  <button>Toggle dropdown</button>
</my-custom-dropdown>
With something like this inside:
<div myVisualDirective myOpenCloseLogic [myDropdown]="content">
  <ng-content />
</div>
What downsides does this approach have?
- You have wasted a component slot just for composition — you do not really need this template, all it does is complicate DOM structure to apply directives.
- It is hard to configure — you have to drill all options like dropdown content to the directives applied inside.
- All those directives are in the view and therefore are not available to inject through DI if you want them down the line.
With Angular 15+ we can just have a directive to apply everything and it will solve all the problems listed above:
@Directive({
  standalone: true,
  selector: '[customDropdown]',
  hostDirectives: [
    VisualDirective,
    OpenCloseLogic,
    {
      directive: Dropdown,
      inputs: ['myDropdown: customDropdown'],
    },
  ],
})
export class CustomDropdown {}
As you can see we can even alias inputs to make it as simple to use as possible:
<button [customDropdown]="template">Toggle dropdown</button>
Sidequest: directive styles
Sometimes applying directives is not the only reason we have a wrapping component. One of the most requested features for Angular is to allow directives to bundle styles. Currently we can only ship styles with components and therefore if we need something like autoprefixr, preprocessor or styles like keyframes or event just :hover — we must have a component since these things do not work with inline [style] binding.
We can also use global styles, but it is not composable, not tree-shakable and hard to ship and set up with libraries.
We remedy that with a simple workaround using unencapsulated styles and dynamic components:
@Component({
  standalone: true,
  template: '',
  styles: '[myDir]:hover { color: red }',
  encapsulation: ViewEncapsulation.None,
})
class MyDirStyles {}

@Directive({
  standalone: true,
  selector: '[myDir]',
})
export class MyDir {
  protected readonly nothing = withStyles(MyDirStyles);
}
What does withStyles do? It's a utility to instantiate the component which would cause styles to be added to head. We need a DI token that stores instantiated components:
const MAP = new InjectionToken('', {
  factory: () => {
    const map = new Map();

    inject(DestroyRef).onDestroy(() =>
      map.forEach((component) => component.destroy())
    );

    return map;
  }
});
And a little helper to inject it and add our component when directive is created:
export function withStyles(component: Type<unknown>) {
  const map = inject(MAP);
  const environmentInjector = inject(EnvironmentInjector);

  if (!map.has(component)) {
    map.set(component, createComponent(component, {environmentInjector}));
  }
}
Now our directives can combine logic with hostDirectives and apply styles using withStyles. With everything above addressed, time to dive into actual Directive Composition API cases.
Examples
I'll pull most of the examples directly from our library. There are many directives we apply as host directives, we will focus on these:
- Appearance
- Icons
- Dropdown
- ControlValueAccessor
- Maskito
Appearance
All our components use the same fundamental directive to control their interactive appearance. The Taiga UI theme consists of declaration of CSS variables and those appearances. For example, see "Accent" source code.
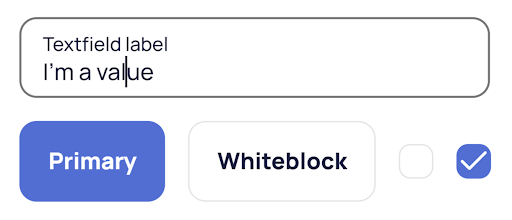
It uses mixins for :hover and :active state so hover is not applied on touch devices and those state styles are only used on interactive elements, such as buttons or links. This way when using non-interactive badges, hovering them does not change color. Appearance directive allows you to also set states manually, for example, if you want your button with a dropdown to look pressed while the dropdown is open. This directive is applicable to buttons, chips, badges and many other components across our UI kit. It helps us reuse style declarations and behaviors, add new or custom appearances easily and then use them everywhere. For example checked checkbox uses "Primary" appearance and unchecked uses "Whiteblock", same as buttons or, potentially, even textfields:
By including this directive with one line, we can enable this functionality for any component and we don't need an extra wrapping element to apply it to.
Icons
This one is a bit more interesting. In Taiga UI 4 we moved to using CSS masks to color SVG icons with CSS. It's a pretty cool technique, because it does not even require an additional DOM element, an icon can be inside ::before/::after pseudo-element.
Check out this Stackblitz for more interesting examples of using CSS mask!
And since we do not need a DOM element — we can use a directive. Same approach with pseudo-elements can be applied to buttons, links, tabs, badges and so on. Logic that resolves the icon by its name is stored in a directive, and that directive exposes iconStart/iconEnd inputs. All we need to do is prepare our components with gaps and margins, so that when icons are added — they are properly positioned.
Dropdown
Moving on from cosmetics we can take a look at our dropdowns. Previously, I already explored decomposition by dissecting dropdowns and hints in Taiga UI. I highly recommend you to read my previous article. Host directives allow us to expand upon the ideas stated there.
Basically, our dropdowns answer these questions with directives:
- What to show?
- When to show?
- Where to show?
And Directive Composition API is a great way to bundle those directives together. For example, we have [(tuiDropdownOpen)] that controls a dropdown by manually passing true/false. It is also a two-way binding, because it includes ActiveZone directive (which you can read about here) so that it can close dropdown when we click away or navigate away with the keyboard and report it with an output.
This directive in itself is a collection of host directives, but we can add it to textfields and expose both input and output to create select/combo-box/date-picker extensions to basic input. Multiple layers of host directives can be very useful!
ControlValueAccessor
Another good case for host directives is ControlValueAccessor. But more generally — solving cyclic dependencies. Imagine you have an accessor that does most of what you need it for. But for some particular case you might want to check if control is touched, for example. You would need to inject NgControl, but that would cause cyclic dependencies, since it already injects your class as the ControlValueAccessor.
What you can do is isolate that logic into a little directive and just add it as a host directive to your accessor. This would move it out of the way to be instantiated later when both classes are ready. This is a good example of solving a particular problem, but this approach can also be used just to break down long classes into independent pieces of code. Especially, since you can expose inputs.
For example, in Taiga UI we have vertical and horizontal Tabs as 2 different components. But logic that tracks the currently active tab is reused across them as a host directive. In the Carousel, logic that rotates slides is moved outside the main component — something that wouldn't be possible with providers because we need to be able to control the duration per slide. InputFiles component also moved some independent logic into a host directive — checking file type and size. It's especially useful since such a directive can implement NG_VALIDATORS to improve DX when working with forms.
Maskito
Maskito is our framework-agnostic input masking library. A good place to learn about it would be my overview. It might be really helpful for your projects! In Angular, it comes as a directive. It's easy to apply to general inputs, but sometimes you want to bundle a particular mask into a component.
One such example would be inputting credit card information. We have a mask for the card number that shows it in chunks of 4 digits. We have an expiration date that would not allow you to enter the 13th month. And the CVC to only enter 3 digits. We could have just exposed those mask configs and let people apply them manually, but there are other helpful things a complete InputCard component can do. It can parse the payment system for you or keep chunks together in the actual form control, add a proper autocomplete attribute.
That's when host directives come in handy. We can bundle Maskito with our components and configure the mask under the hood, so it's there, ready to use with one import. Same goes for many other inputs that require masking — phone numbers, dates, time or numbers.
There are a lot more other examples, but I fear it might get overwhelming. If you want to learn more, you can explore Taiga UI source code. That Maskito case required us to configure a host directive from its host. And that brings us neatly to the issues section of this article.
Caveats
Working heavily with Directive Composition API I can highlight 3 main problems that let this feature down. No deal breakers though, so that's great!
No built-in control
We already saw an issue with the last example — it is hard to control inputs/props of host directives from within the host. I know this is something currently on the radar of the Angular team and they will hopefully address this issue in future. But for now we can do it ourselves using signals and a helper.
Signal inputs are not programmatically changeable, but models are! Until the Angular team adds a way to manually set signal input value, they are a hard pass for me. It's a shame, since they had transformers.
First we need to inject the directive we want to control, then state a property we plan to use and provide a value for it. We might want to control it in 2 ways: imperative updates (effectively a setter) or declarative updates (effectively a getter). Signals work great here. Writable signals act as a setter, while computed would work as a getter:
private readonly setter = binding(MyDir, 'prop1', initialValue);
private readonly getter = binding(MyDir, 'prop2', computed(() => this.signal));
That's our helper public API in a nutshell, we can now call setter.set(value) to update prop1 and we can control prop2 with other signals, used in computed. I have previously posted about this on X with a Stackbliz for fully typed source code, check it out:
#AngularTip for the day! Want to be able to declaratively control inputs/public properties of `hostDirectives` from your components? With signals it is possible with a simple wrapper, check it out:https://t.co/rHBbX3Il84 pic.twitter.com/xAc2r92uIB
— Alex Inkin (@Waterplea) June 3, 2024
Manual inputs exposure
I would much rather have host directives expose all inputs automatically and have concealing them an opt-in, not the other way around. This is not how the Angular team sees it, as they are worried updating some third party library version can have your components expose unexpected inputs. I don't see value in that additional safety. What I value is brevity. Problem is — you cannot just store an object with directive and inputs as a constant, since that will not be statically analyzable.
What we can do though, is create wrapping directives. We have adopted that pattern in Taiga UI. Imagine you have a directive A with 3 inputs. Instead of writing it all the time as an object with an array of all those inputs, we can create one more little directive:
@Directive({
  standalone: true,
  hostDirectives: [{
    directive: A,
    inputs: ['input1', 'input2', 'input3'],
  }],
})
export class WithA {}
Now we can easily expose all those inputs with one class, adding WithA instead of A into hostDirectives when we need it. If you were carefully reading documentation when this feature first came out, you might remember there was a performance note warning us against using too many host directives. However it is now gone because benchmarking shows the memory/performance overhead is trivial. You can explore this Stackblitz to stress test the Directive Composition API yourself.
Double matching
Biggest problem you would have to work around is that host directives throw an error if the same directive ends up matched twice on the same element. Frankly, I think this is something the Angular team just needs to straight up address. I firmly believe they should initialize the directive the first time we meet it and ignore all other matches, like Angular does with providers. There are some concerns regarding order of execution. It's not clear this way, which directive is created first. And directives might come in conflict when they try to bind the same property on host, for example.
Regular directives are created in order of the matching attributes on the element, so you can kind of control that. I would argue that if your directives rely on the order of initialization — that's a huge anti-pattern already and it shouldn't hold Directive Composition API back. Overall, this is probably an issue I had most problems with, especially since it can come up unexpectedly through several layers of host directives. So I hope the Angular team improves that.
The easiest way to run into this issue is to expose the directive and then import it again. Say you have a highlight directive that has color input:
@Directive({
  standalone: true,
  selector: '[appHighlight]',
})
export class HighlightDir {
  // ...
}
Imagine you expose appHighlight as an input when attaching it to some component, but in the same template you also want to use it somewhere else, so you import it. You end up with this directive matched twice on the same element. Once through exposed host directive input and second time by the attirbute of that input as a plain directive.
So my tip to you is: always alias exposed inputs to avoid accidental double matches.
Alternatively, don't forget that you can omit selector altogether if your directive is expected to only work as host directive.
Summary
I hope this article gave you a good overview of Directive Composition API and the power it brings to you as an Angular developer. There are limitations to this approach, as always. But everything can be dealt with, for the most part. I really like the new composition patterns it unlocked and believe people can benefit from exploring them.
A quick recap for this feature in a few bullets:
hostDirectivesallow you to automatically apply standalone directives to other directives or components- You can compose independent logical blocks together declaratively, multiple levels deep
- This is a lot like providers, but with additional benefits like inputs and host bindings
- It has several caveats that can be addressed with a few helpers and best practices
- Check out examples in this article and their source code to get a taste of what you can do
Now big complex tasks can be broken down into easily digestible pieces that come together seamlessly through this new API. And the Angular team will definitely polish it further when more people start using it and discover different ergonomics and pitfalls.