

Part 1: Setting the Stage - Basic Resource Fetching
Angular's resource() method provides a straightforward way to handle asynchronous data fetching. We'll start with the most basic scenario: fetching weather data using the resource method. This will set the foundation for more advanced techniques.
Let's start with the basic component. We'll define a resource that fetches data, and have a button that refetches the data when clicked. We'll also display the loading state and weather information once the data is loaded.
Here’s the initial component code:
import { Component, resource } from '@angular/core';

interface WeatherData {
  temperature: number;
  condition: string;
  icon: string;
}

@Component({
  selector: 'app-weather-info',
  template: `
    <div class="card bg-base-200 w-96 shadow-xl mx-auto">
      <div class="card-body flex flex-col items-center gap-4">
        <button
          class="btn btn-block btn-primary btn-outline"
          (click)="weatherResource.reload()"
        >
          Get Weather Info
        </button>
        @if (weatherResource.isLoading()) {
          <span class="loading loading-spinner loading-lg"></span>
        } @else if (weatherResource.value()) {
          <img
            [src]="weatherResource.value()?.icon"
            class="w-20 object-fit"
            alt="weather icon"
          />
          <p class="text-2xl">
            Temperature: {{ weatherResource.value()?.temperature }}
          </p>
          <p class="text-xl">
            Condition: {{ weatherResource.value()?.condition }}
          </p>
        }
      </div>
    </div>
  `,
})
export class WeatherInfoComponent {
  weatherResource = resource<WeatherData, string>({
    loader: async ({ abortSignal }) => {
      const response = await new Promise<Response>((resolve) => {
        setTimeout(() => {
          fetch('assets/weather.json', { signal: abortSignal }).then((r) =>
            resolve(r)
          );
        }, 1500);
      });
      if (!response.ok) {
        throw new Error('Could not fetch data');
      }
      const data = await response.json();
      return data as WeatherData;
    },
  });
}

Explanation:
- Imports: We import
Componentandresourcefrom@angular/core. - Types: The
WeatherDatainterface is defined to match the structure of the data we expect from the JSON file. - Component Properties:
weatherResource: This is aResourcethat manages the asynchronous data fetching process. The result of theresource()method is assigned to it.
weatherResourceInitialization:- The
resource()method is called to initializeweatherResourcewhen the component is instantiated. This also sends our first HTTP call via the loader function. - The
loaderoption is defined as an asynchronous function. This function simulates an API call by fetching data fromassets/weather.jsonwith a 1.5-second delay usingsetTimeout, and includes anabortSignalto handle cancellations. - If the network response isn't ok, it will throw an error, that the
resource()method will handle. - If everything goes well, the data is returned.
- The
- Template:
- A button is present, that calls the
weatherResource.reload()method. This will re-trigger the loader function, fetching the data again. - The template uses
@ifblocks, and theweatherResourcemethodsisLoading(),value()to show a loading state or the data.
- A button is present, that calls the
Key Takeaways:
- The
resource()method simplifies asynchronous data fetching by managing the loading state, handling errors, and providing the data once it has been loaded. - The template is reactive, updating automatically when the resource's state changes.
- We are using
weatherResource.reload()method to re-trigger the data fetch.
Part 2: Loading Resources On-Demand
In the previous example, the resource was initialized immediately when the component was created, triggering a data fetch. What if you want to defer this fetch until a specific action? You can use the request attribute to control when the resource's loader is executed, allowing you to load resources on-demand.
Let's modify our previous example to include a weatherRequestState signal. This signal will determine if the resource's loader should be triggered. This way, we can load our resource on-demand based on user interactions.
Here's the updated code:
import { Component, resource, signal } from '@angular/core';

interface WeatherData {
  temperature: number;
  condition: string;
  icon: string;
}

type WeatherRequestState = 'idle' | 'ready';

@Component({
  selector: 'app-weather-info',
  template: `
    <div class="card bg-base-200 w-96 shadow-xl mx-auto">
      <div class="card-body flex flex-col items-center gap-4">
        <button class="btn btn-block btn-primary btn-outline" (click)="getWeatherInfo()">
          Fetch Weather
        </button>
        @if (weatherResource.isLoading()) {
          <span class="loading loading-spinner loading-lg"></span>
        } @else if (weatherResource.value()) {
          <img
            [src]="weatherResource.value()?.icon"
            class="w-20 object-fit"
            alt="weather icon"
          />
          <p class="text-2xl">
            Temperature: {{ weatherResource.value()?.temperature }}
          </p>
          <p class="text-xl">
            Condition: {{ weatherResource.value()?.condition }}
          </p>
        }
      </div>
    </div>
  `,
})
export class WeatherInfoComponent {
  weatherRequestState = signal<WeatherRequestState>('idle');
  weatherResource = resource<WeatherData, WeatherRequestState | undefined>({
    request: () => {
      if (this.weatherRequestState() === 'idle') {
        return undefined;
      }
      return this.weatherRequestState();
    },
    loader: async ({ abortSignal }) => {
      const response = await new Promise<Response>((resolve) => {
        setTimeout(() => {
          fetch('assets/weather.json', { signal: abortSignal }).then((r) =>
            resolve(r)
          );
        }, 1500);
      });
      if (!response.ok) {
        throw new Error('Could not fetch data');
      }
      const data = await response.json();
      return data as WeatherData;
    },
  });

  getWeatherInfo() {
    if (this.weatherRequestState() !== 'ready') {
      this.weatherRequestState.set('ready');
    } else {
      this.weatherResource.reload();
    }
  }
}

Changes:
- We've introduced a
weatherRequestStatesignal to control when the resource should load. The state can be'idle'or'ready'. - The
requestattribute of the resource is now defined as a function that returns theweatherRequestStatevalue, orundefinedif the state is'idle'. - The
loaderfunction will only be called when therequestfunction returns'ready'. - The
getWeatherInfo()method now checks if the current state is'idle', in that case it sets theweatherRequestStateto'ready', otherwise it callsweatherResource.reload()to refetch data.
Key Takeaways:
- We can use the
requestattribute to load the resource on-demand, only when needed. - The
loaderfunction will only run when therequestfunction returns a value different thanundefined.
Part 3: Handling Errors
Data fetching isn't always smooth, so it's important to handle potential errors gracefully. Let's extend the application to include error handling, and to simulate an error when fetching the data.
We'll add a new button that attempts to fetch data with an error. This will demonstrate how to display error messages.
Here's the modified code:
import { Component, resource, signal } from '@angular/core';
interface WeatherData {
  temperature: number;
  condition: string;
  icon: string;
}

type WeatherRequestState = 'idle' | 'ready' | 'simulateError';

@Component({
  selector: 'app-weather-info',
  template: `
    <div class="card bg-base-200 w-96 shadow-xl mx-auto">
      <div class="card-body flex flex-col items-center gap-4">
        <button class="btn btn-block btn-primary btn-outline" (click)="getWeatherInfo()">
          Fetch Weather
        </button>
        <button
          class="btn btn-block btn-error btn-outline"
          (click)="getWeatherInfoWithError()"
        >
          Get Weather Info with error
        </button>
        @if (weatherResource.isLoading()) {
          <span class="loading loading-spinner loading-lg"></span>
        } @else if (weatherResource.error()) {
          <div role="alert" class="alert alert-error">
            <svg>...</svg>
            <span>{{ weatherResource.error() }}</span>
          </div>
        } @else if (weatherResource.value()) {
          <img
            [src]="weatherResource.value()?.icon"
            class="w-20 object-fit"
            alt="weather icon"
          />
          <p class="text-2xl">
            Temperature: {{ weatherResource.value()?.temperature }}
          </p>
          <p class="text-xl">
            Condition: {{ weatherResource.value()?.condition }}
          </p>
        }
      </div>
    </div>
  `,
})
export class WeatherInfoComponent {
  weatherRequestState = signal<WeatherRequestState>('idle');
  weatherResource = resource<WeatherData, WeatherRequestState | undefined>({
    request: () => {
      if (this.weatherRequestState() === 'idle') {
        return undefined;
      }
      return this.weatherRequestState();
    },
    loader: async ({ abortSignal, request: requestState }) => {
      const response = await new Promise<Response>((resolve) => {
        setTimeout(() => {
          fetch('assets/weather.json', { signal: abortSignal }).then((r) =>
            resolve(r)
          );
        }, 1500);
      });
      if (!response.ok) {
        throw new Error('Could not fetch data');
      }
      if (requestState === 'simulateError') {
        throw new Error('Something went wrong');
      }
      const data = await response.json();
      return data as WeatherData;
    },
  });

  getWeatherInfo() {
    if (this.weatherRequestState() !== 'ready') {
      this.weatherRequestState.set('ready');
    } else {
      this.weatherResource.reload();
    }
  }

  getWeatherInfoWithError() {
    this.weatherRequestState.set('simulateError');
  }
}

Changes:
- We've introduced a
simulateErrorstate to theWeatherRequestStatetype. - The
weatherRequestStatesignal is now used to control if the loader should simulate an error. - The
loaderfunction now checks if the request state is'simulateError', and if it is, it throws a new error. - The
getWeatherInfoWithErrormethod is introduced to set theweatherRequestStatetosimulateError, triggering a data fetch with a simulated error. - The template is updated to display the error using
weatherResource.error().
Key Takeaways:
- We're using the
weatherRequestStatesignal to control the initial loading of the data, and to simulate errors on the loader. - The
resource()method will catch errors thrown in theloaderfunction, and make them available through theerror()signal. - The template uses
weatherResource.error()to display the error message.
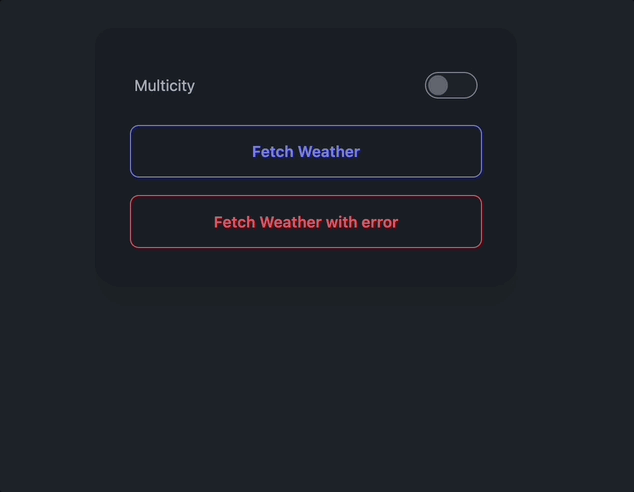
Part 4: Dynamic Resource Switching (Multi-City Support)
Let's now introduce more dynamic behavior into our component by enabling the user to switch between single and multi-city modes. When switching modes, we'll modify how the resource fetches the data, using the request option to control the fetching process.
We'll add a toggle switch and a dropdown to allow the user to select their desired city when in multi-city mode.
Here’s the complete component code:
import { Component, resource, signal } from '@angular/core';
import { FormsModule } from '@angular/forms';

type City = 'Stockholm' | 'Milan';

interface WeatherData {
  temperature: number;
  condition: string;
  icon: string;
  city?: City;
}

type WeatherRequestState = 'idle' | 'ready' | 'simulateError';

type WeatherResourceConfig = {
  requestState: WeatherRequestState;
  isMultiCityMode: boolean;
  selectedCity: City;
};

@Component({
  selector: 'app-weather-info',
  imports: [FormsModule],
  template: `
    <div class="card bg-base-200 w-96 shadow-xl mx-auto">
      <div class="card-body flex flex-col items-center gap-4">
        <div class="form-control w-full">
          <label class="label cursor-pointer">
            <span class="label-text">Multicity</span>
            <input
              (ngModelChange)="getWeatherInfo()"
              [(ngModel)]="isMultiCityMode"
              type="checkbox"
              class="toggle toggle-primary"
            />
          </label>
        </div>
        @if (isMultiCityMode()) {
          <select [(ngModel)]="selectedCity" class="select select-primary w-full">
            @for(city of cities; track city) {
            <option [value]="city">{{ city }}</option>
            }
          </select>
        } @else {
          <button
            class="btn btn-block btn-primary btn-outline"
            (click)="getWeatherInfo()"
          >
            Get Weather Info
          </button>
        }
        <button
          class="btn btn-block btn-error btn-outline"
          (click)="getWeatherInfoWithError()"
        >
          Get Weather Info with error
        </button>
        @if (weatherResource.isLoading()) {
          <span class="loading loading-spinner loading-lg"></span>
        } @else if (weatherResource.error()) {
          <div role="alert" class="alert alert-error">
            <svg>...</svg>
            <span>{{ weatherResource.error() }}</span>
          </div>
        } @else if (weatherResource.value()) {
          <img
            [src]="weatherResource.value()?.icon"
            class="w-20 object-fit"
            alt="weather icon"
          />
          <p class="text-2xl">
            Temperature: {{ weatherResource.value()?.temperature }}
          </p>
          <p class="text-xl">
            Condition: {{ weatherResource.value()?.condition }}
          </p>
        }
      </div>
    </div>
  `,
})
export class WeatherInfoComponent {
  weatherRequestState = signal<WeatherRequestState>('idle');
  isMultiCityMode = signal<boolean>(false);
  cities: City[] = ['Stockholm', 'Milan'];
  selectedCity = signal<City>(this.cities[0]);
  weatherResource = resource<
    WeatherData | undefined,
    WeatherResourceConfig | undefined
  >({
    request: () => {
      if (this.weatherRequestState() === 'idle') {
        return undefined;
      }
      return {
        requestState: this.weatherRequestState(),
        isMultiCityMode: this.isMultiCityMode(),
        selectedCity: this.selectedCity(),
      };
    },
    loader: async ({ abortSignal, request }) => {
      if (!request) {
        return undefined;
      }
      const { requestState, isMultiCityMode, selectedCity } = request;
      const response = await new Promise<Response>((resolve) => {
        setTimeout(() => {
          const url = isMultiCityMode
            ? 'assets/weather-multi.json'
            : 'assets/weather.json';
          fetch(url, { signal: abortSignal }).then((r) => resolve(r));
        }, 1500);
      });
      if (!response.ok) {
        throw new Error('Could not fetch data');
      }
      if (requestState === 'simulateError') {
        throw new Error('Something went wrong');
      }
      const data = await response.json();
      if (isMultiCityMode) {
        const weatherInfo = (data as WeatherData[]).find(
          (info) => info.city === selectedCity
        );
        if (!weatherInfo) {
          throw new Error('Weather info not found');
        }
        return weatherInfo;
      }
      return data as WeatherData;
    },
  });

  getWeatherInfo() {
    if (this.weatherRequestState() !== 'ready') {
      this.weatherRequestState.set('ready');
    } else {
      this.weatherResource.reload();
    }
  }

  getWeatherInfoWithError() {
    this.weatherRequestState.set('simulateError');
  }
}
Changes:
FormsModule: It is imported to use thengModelwith the toggle, and the select element.citiesandselectedCity: Thecitiesarray is created, as well as theselectedCitysignal to store the selected city.isMultiCityMode: A signal to store whether the user wants to use multi-city mode or not.- The
requestattribute now sends theweatherRequestState,isMultiCityMode, andselectedCityto the loader. - Template:
- A toggle is added to switch between the single and multi city modes.
- A select element is displayed when the multi city mode is enabled to select the desired city.
getWeatherInfoMethod: This method checks if the multi mode is enabled or disabled, and sets theweatherRequestStatesignal toready, or reloads the data.getWeatherInfoWithError()Method: Sets theweatherRequestStatetosimulateError, triggering a fetch with error in single mode.- The
loadernow fetches different data based on theisMultiCityMode. If it's true, it will fetch data from aweather-multi.json, and filter the data by the selected city.
Key Takeaways:
- We're now controlling the loading of the data through the
weatherRequestStatesignal, initializing the resource on-demand. - The
requestattribute can be used to send more data to the loader. - The
loadernow handles different scenarios: loading, errors, single city, and multi city, using the value sent by therequestattribute.
Conclusion
This progressive guide has showcased how to utilize Angular's resource() method for fetching data, handling errors, and dynamically switching between different fetching behaviors. By gradually building upon basic examples, we've explored how to manage diverse scenarios and how to control the loading of resources on-demand. We've also seen how to use the request attribute to send more information to the loader, adding flexibility to our data fetching process.
Important Note: The examples in this article are for illustrative purposes and to demonstrate the capabilities of the
resourceAPI. In a production application, it's recommended to abstract HTTP calls into dedicated Angular services and handle error scenarios in a more robust and centralized manner. Additionally, avoid simulating errors directly within component logic.
Btw
Note: Shameless plugs below...
- If you're new to Angular, check out my FREE 90 minutes Angular Crash Course (people love it ❤️)
- If you want to dive deep into Angular with over 90 projects, check out the Angular Cookbook
- And if you want to dive deep into Angular, check out my book (Modern Angular: Mastering Signals). I'm working on it at the time of writing this article.
Hope this article helps you with a leap forward in your Angular journey.
As always, happy coding!