

The Performance is one of the most important goals when we build web applications. In today's world, we work with a huge number of components and need to think about how to improve the bundle size in our apps.
For example, this is great for online shops because it makes pages load faster and become usable more quickly, keeping customers happy. However, just breaking things into smaller pieces doesn't automatically make everything super fast. We still need to make sure our code and files are well-organized so everyone gets a smooth experience.
The Angular team knows this and has recently launched some amazing features for lazily loading components, called "deferrable views"
What are Deferrable Views?
Deferrable views are the easiest way to implement lazy loading and split our code into chunks to improve user performance, loading the code only when we really need it.
The deferrable view with @defer block allows us to load our components with less code and without imperative programming, making easy to perform lazy loading. The Angular team has provided some out-of-the-box triggers to lazily load components and there is a possibility to customize triggers to match with our business cases.
But, wait a minute? We already have lazy loading in Angular 😠!
We have a nice way to use lazy loading and create chunk-specific routing. For example, when the user navigates to a specific route, we then load a particular component.
import { Routes } from '@angular/router';

export const routes: Routes = [
  {
    path: '',
    loadComponent: () =>
      import('./pages/home/home.component').then((h) => h.HomeComponent),
  },
  {
    path: 'products',
    loadComponent: () =>
      import('./pages/products/products.component').then(
        (p) => p.ProductsComponent
      ),
  },
];
But when we want to load a component dynamic based on other events, we must write imperative logic & code, and combine with few things to make everything work. And it is not easy to handle complex business logic with lazily loading components.
Today, we’re going to learn why should to use the @defer block in Angular to reduce the bundle size and to load dynamic component easy!
Scenario
Let’s say we create a landing page where we show a letter with best Angular 17 features and show Kendo Ninja. In the app, have the following components:
- Letter: Shows a list of links of Angular's new features.
- Ninja: Shows the Kendo UI Ninja.
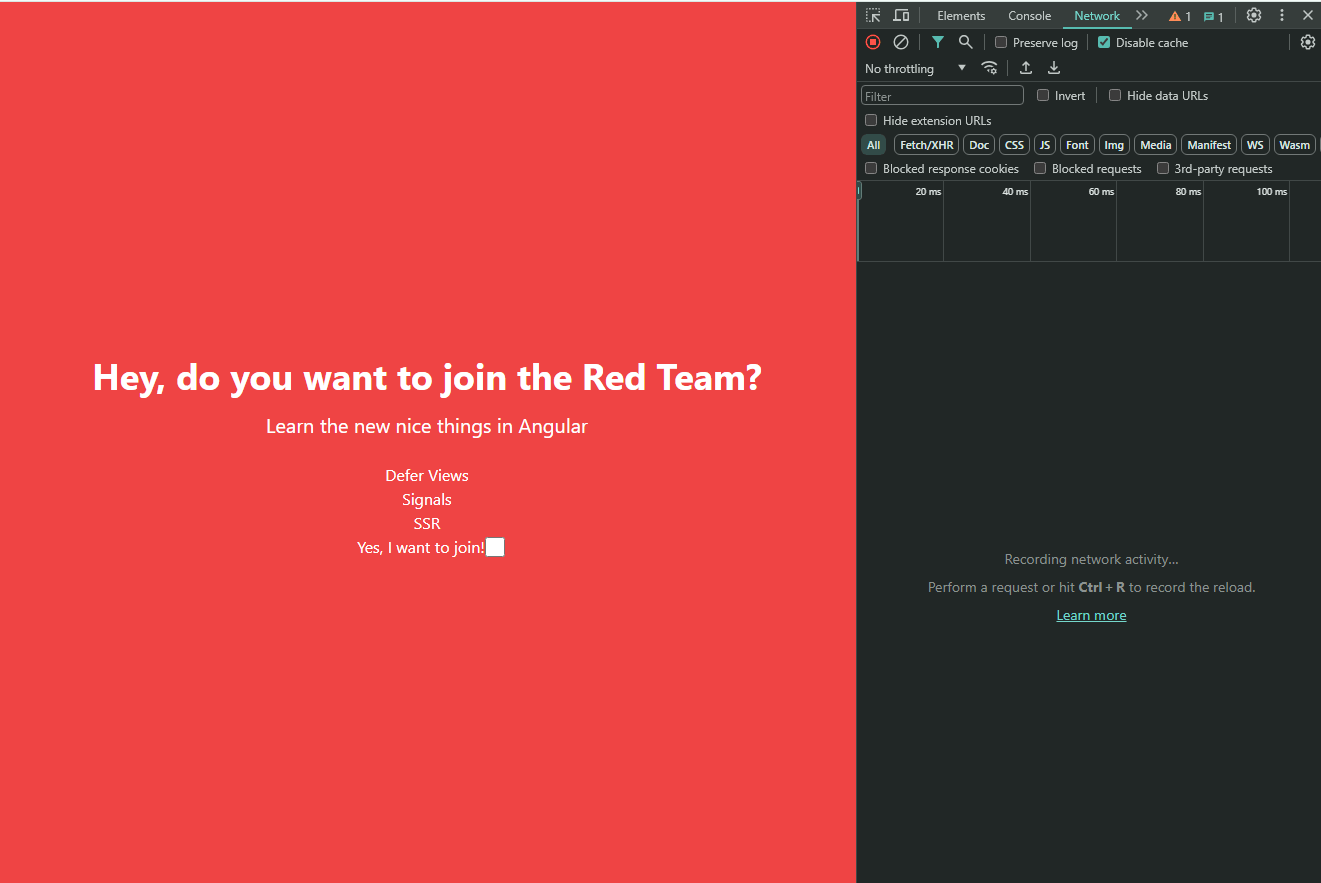
When the user ticks the checkbox, the NinjaComponent appears. By using the @if block, we change the boolean accepted to true, and it shows the <ninja/> component.
The code looks something like this:
<letter/>
<p>Do you accept?</p>
<input (change)="accept()" type="checkbox">
@if(accepted) {
  <ninja/>
}
Let's clone the repo and install the dependencies to see the current code:
git clone https://github.com/danywalls/learn-defer-views-angular.git
cd learn-defer-views-angular
npm i
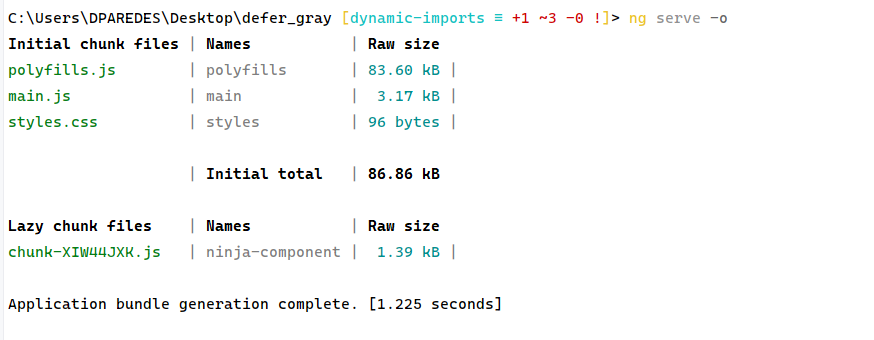
After that, we can see special details in the output, a single main.js with polyfills.js and styles.css.
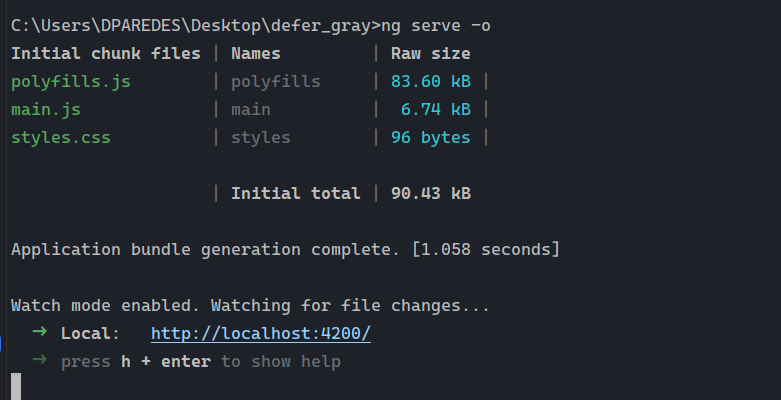
After that, run ng serve -o to see the application at http://localhost:4200, and open the developer tools (F11) and go to the tab. We see a bunch of files, but one is important. The main.js contains the bundle of our app with all components in a single file.
Maybe you're thinking why we are sending components that the user doesn't see or doesn't need to see only in specific cases ?
For this exact reason, we must use a deferrable view to "manually" load our component lazily, loading a specific .js (or chunk). Let's do it!
Manual Lazy Loading 😞
Open the app.component.ts, declare a new public variable ninja of type, then change the signature of the accept method to a promise.
In the accept method, using dynamic import, set the variable jump with the dynamic import of NinjaComponent.
async accept(): Promise<void> {
       const { NinjaComponent } = await import('./components/ninja.component');
      this.ninja = NinjaComponent;
  }
The final code in app.component.ts looks like:
import {Component, Type} from '@angular/core';
import { RouterOutlet } from '@angular/router';
import {NgComponentOutlet} from "@angular/common";


@Component({
  selector: 'app-root',
  standalone: true,
  imports: [RouterOutlet,  NgComponentOutlet],
  templateUrl: './app.component.html',
  styleUrl: './app.component.scss'
})
export class AppComponent {

  public ninja!: Type<any>;

  async accept(): Promise<void> {
       const { NinjaComponent } = await import('./components/ninja.component');
      this.ninja = NinjaComponent;
  }
}
Next in the app.component.html, add the ng-container element with the ngComponentOutlet directive and set the value of jump.
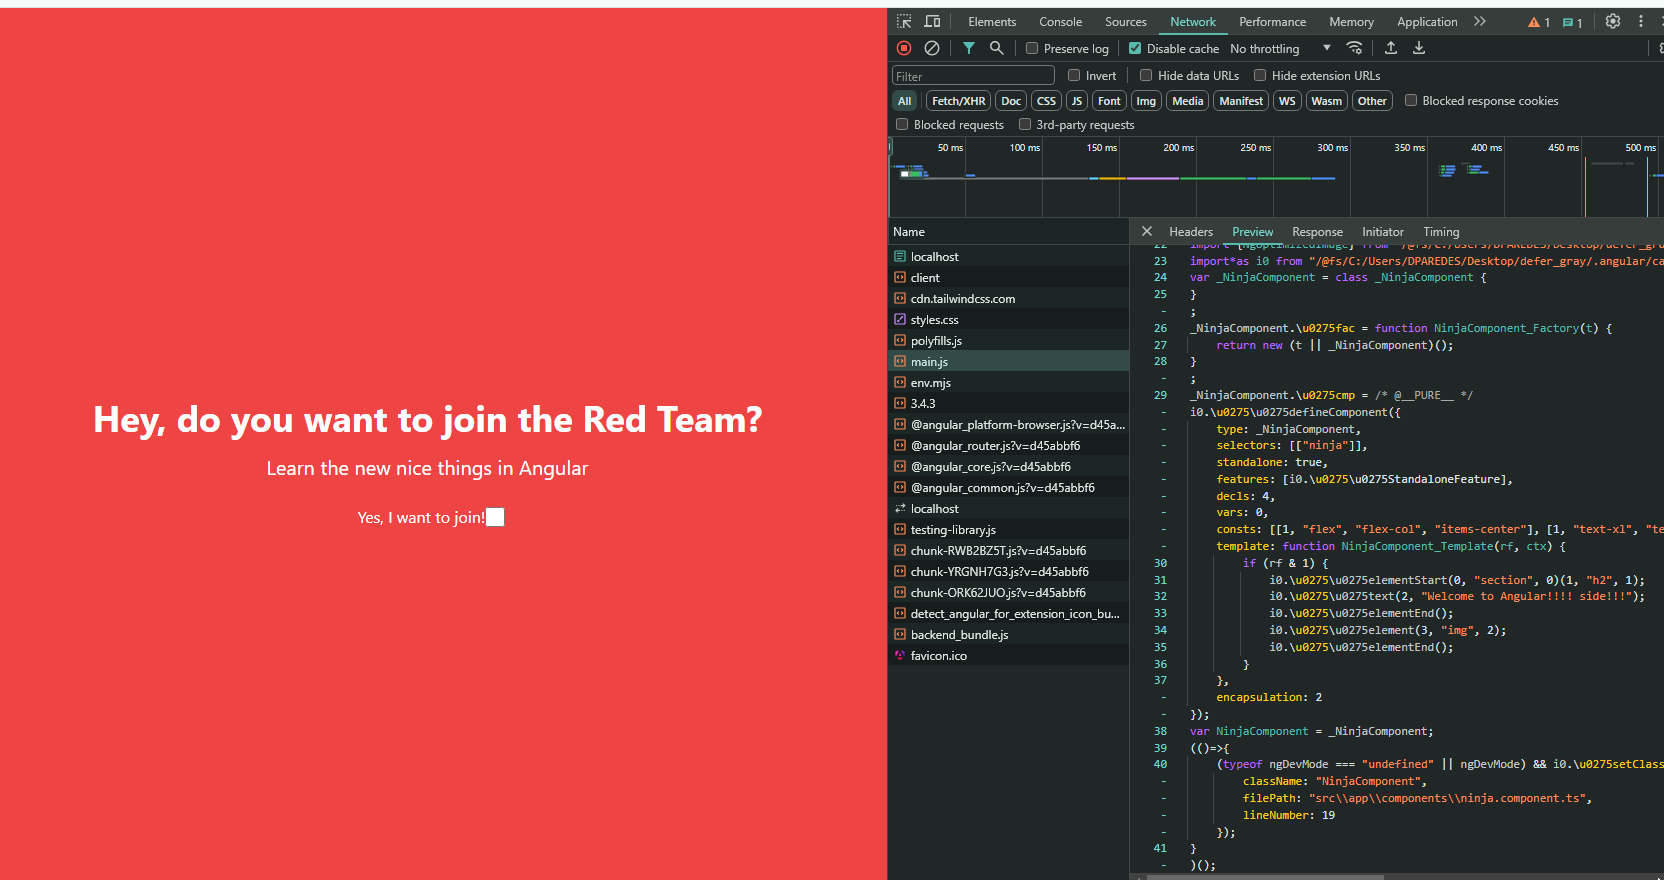
Remember to import the NgComponentOutlet, save the changes, and view the details in the output.
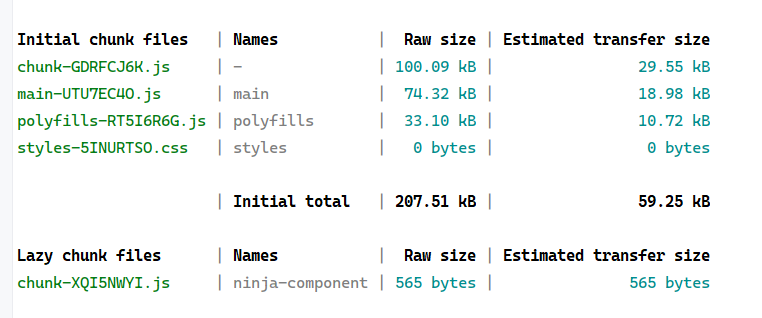
We got a new chunk, chunk-XQI5NWYI.js for the NinjaComponent and it is perfect!
Save changes and reload the page.
When we tick the checkbox input, the desired javascript chunk is downloaded and the component loaded! This is highly optimized to only download the chunk when the user clicks the checkbox.
But do you think this can scale in the future? What happens if tomorrow we want to add new cases to load the component like:
- Load when the users scroll.
- When the browser isn't busy.
- Show a loading indicator while loading.
At this moment, it's not easy. This is when we must switch to defer.
The Defer
Since Angular 17 we have the @defer block available as part of the new Angular Control Flow, allowing us to write declarative code and to lazily load our components easy. That is loading the javascript bundle and rendering the component when some condition or trigger matches and the dependencies are ready.
The @defer block can work combined with @error, @placeholder, @loading and custom triggers.
Before we continue, let's refactor our code.
- Add the
NinjaComponentto the imports section. - Declare a new variable
acceptedinitialized asfalse. - Update the accept method to
void, and inside, set the accepted value.
The final code looks like:
import {Component} from '@angular/core';
import { RouterOutlet } from '@angular/router';
import {NgComponentOutlet} from "@angular/common";
import {NinjaComponent} from "./components/ninja.component";


@Component({
  selector: 'app-root',
  standalone: true,
  imports: [RouterOutlet,  NgComponentOutlet, NinjaComponent],
  templateUrl: './app.component.html',
  styleUrl: './app.component.scss'
})
export class AppComponent {
  accepted = false;

  public accept(): void {
       this.accepted = !this.accepted;
  }
}
The @defer block works only with standalone components.In the HTML markup, update to use the @defer block; it replaces the area with a component when the browser state is idle by default, but we also combine it with triggers when and on.
For example, the defer block will render when the accepted variable is true.
@defer (when accepted) {
        <ninja/>
}
Save changes, the output looks the same without all the boilerplate with the dynamic import and the imports and NgComponentOutlet
Everything continues working with lazy loading and the ninja component is loaded eagerly only when the user clicks as always.
but of course we also have the on trigger to trigger the block based to a list of trigger:
on viewport
The deferred block is triggered when the element enters the viewport area, using the IntersectionObserver API.
@defer (on viewport) {
  <ninja/>
} @placeholder {
  <div class="ninja-placeholder"> </div>
}
on interaction
The deferred block is triggered when the mouse has hover over the trigger area.
@defer (on interaction) {
  <ninja/>
} @placeholder {
  <div class="ninja-placeholder"> </div>
}
timer
The deferred block is triggered after a specified time.
@defer (on timer(4s)) {
  <ninja/>
} @placeholder {
  <div class="ninja-placeholder"> </div>
}
We can continue show a nice examples of trigger but I recommend, read more about triggers and move foward to use @placeholder 😊 and @loading blocks.
The @placeholder and @loading
We are going to lazy load the Ninja component when the user clicks to show it, but with a special process, we want to show a placeholder in the area where the Ninja appears. It helps to us, avoid page shift saving this space for the Ninja component.
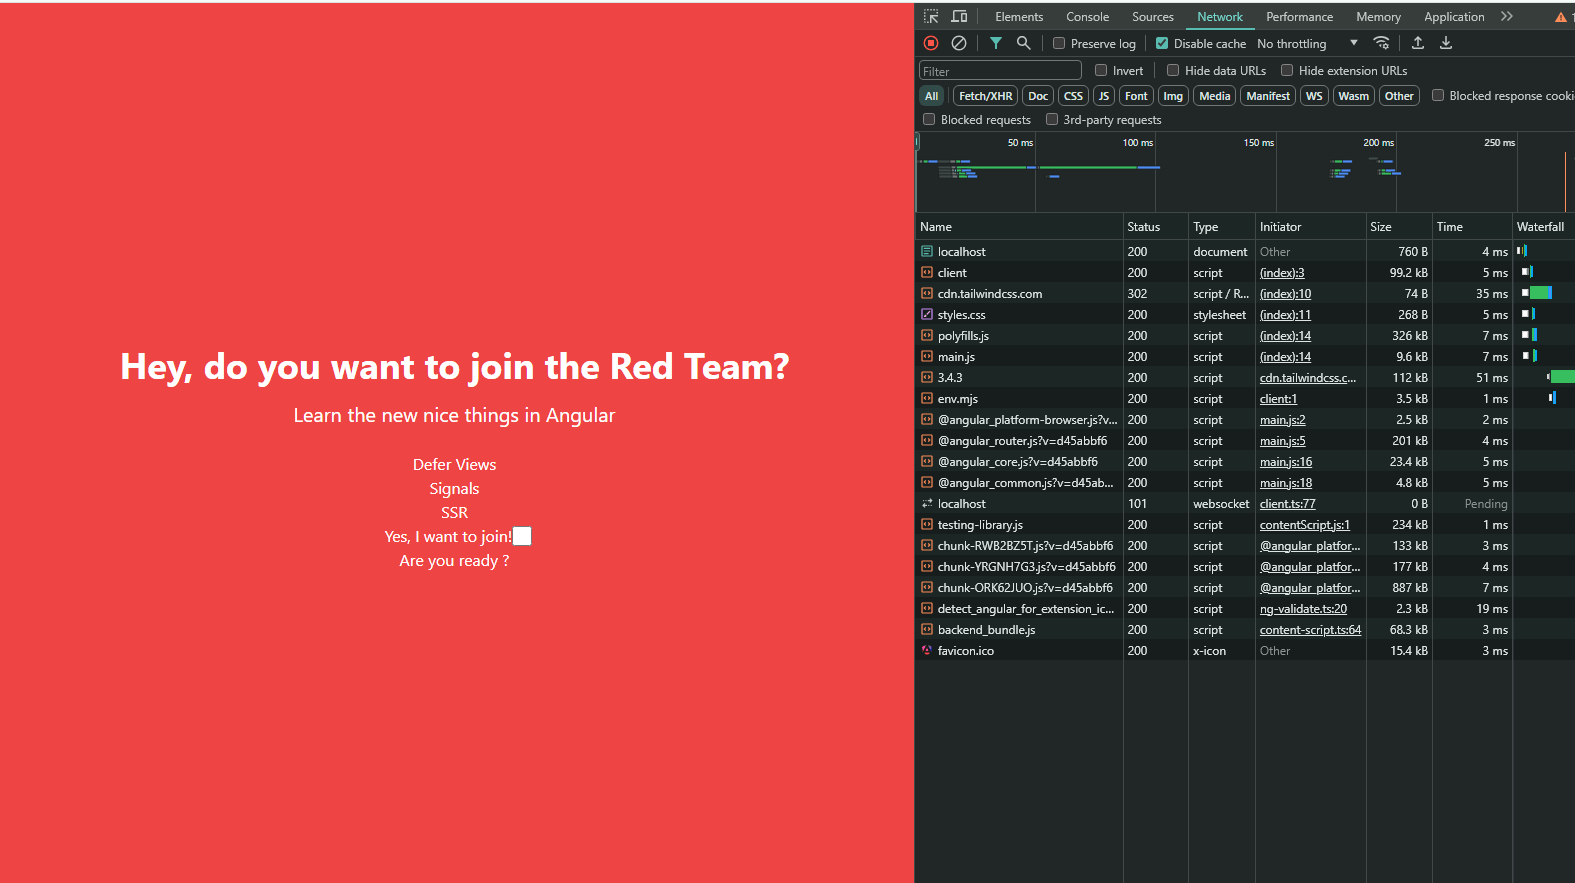
let's show the text "Are you ready" in the area where the NinjaComponent will appear.
@defer (when accepted) {
   <ninja/>
} @placeholder {
   <p>Are you ready ?</p>
}
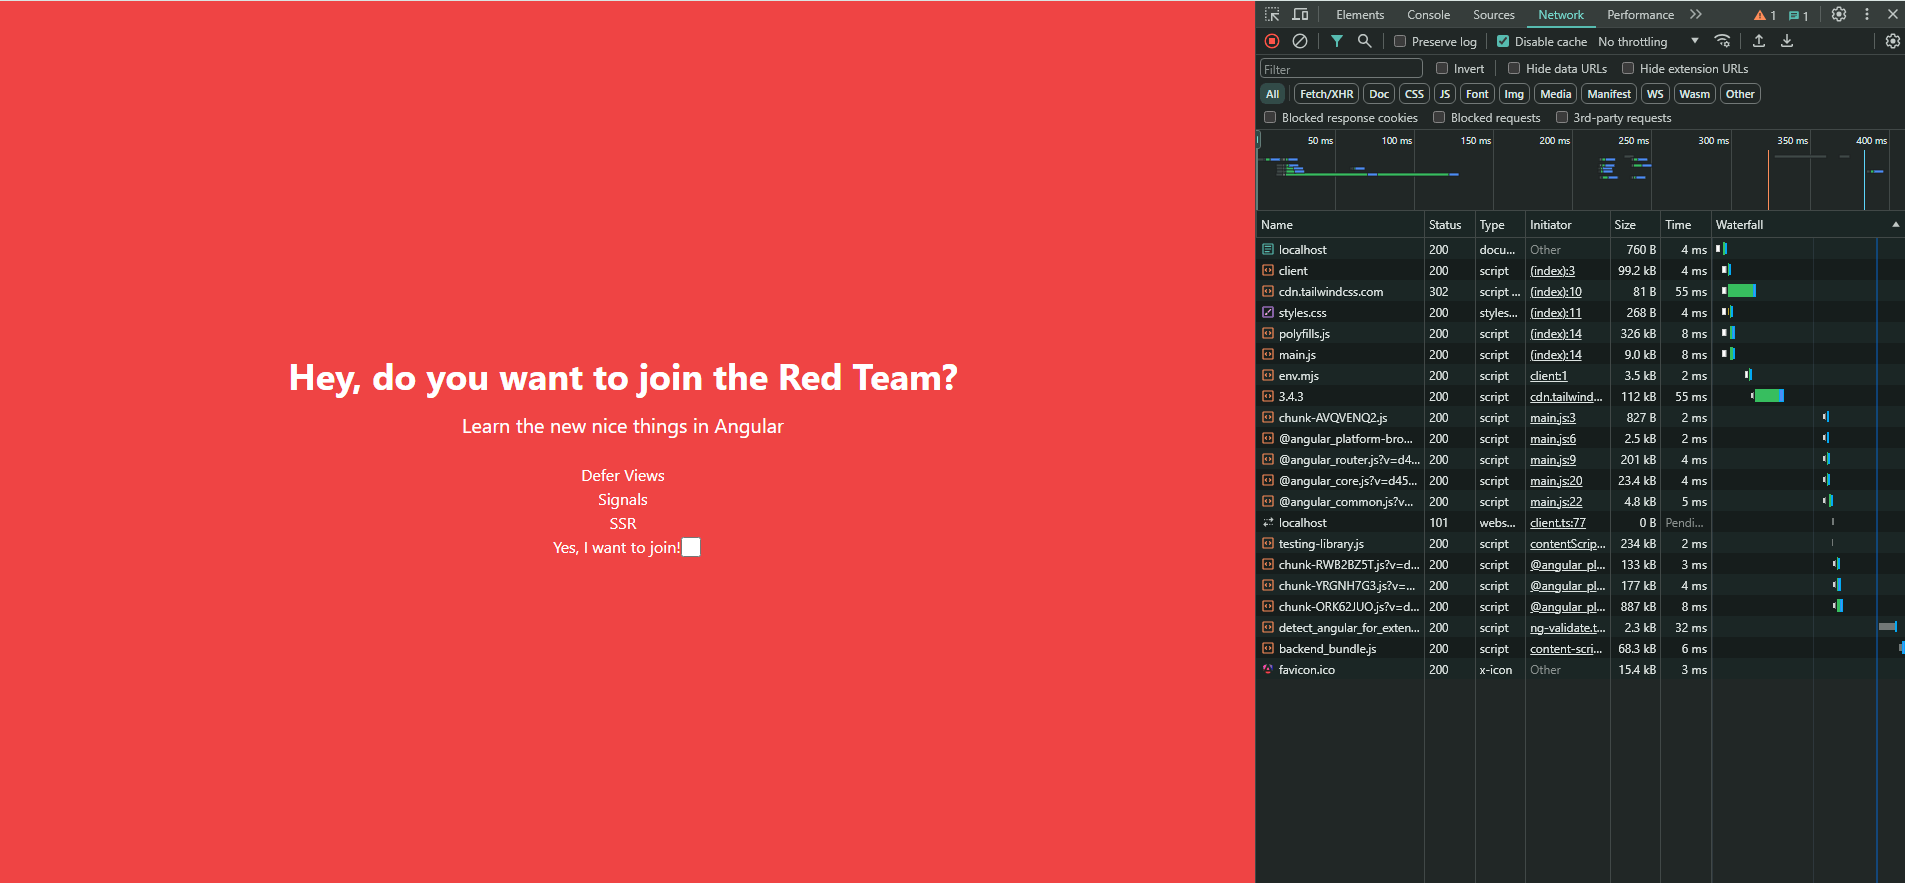
Save and reload the page, and you will see the message "Are you ready?" in the area where the NinjaComponent will appear.
how @placeholder and @loading work together?
Well, the @placeholder is what you see first. It's like a temporary image or message that shows up while the rest of your content is getting ready.
The @loading appears as soon as things start to load. It might be a spinning icon or a progress bar that lets you know something is happening. Once your main content is ready, both @placeholder and @loading go away.
Important: The@loadingblock automatically takes the place of the@placeholderwhen loading starts. Both of these blocks are helpful tools for keeping your users entertained while they wait for the real content to appear.
Great, it works! Now let's enhance the loading process. For instance, I want to display the placeholder, but also show a message while the component is loading. To do this, I'll combine the loading block with the minimum parameter, setting it to 5 seconds.
The minimum setting is used to make sure the loading icon or message shows up for at least a little while, even if your content loads really fast. @loading (minimum 5s) {
<h2>The Ninja is coming...</h2>
}
Save changes and play again! Everything works as expected. Remember, the placeholder and loading are optional blocks, but they are very helpful in improving the user experience.
Important: The code inside the @placeholder and @loading are bundled in the main.ts file.
Conclusion
We explored the advantages of using Angular 17's @defer feature to dynamically lazy-load components, which boosts performance by loading components only when they are needed. The @defer block simplifies the process by removing the need for manual, imperative coding.
We also experimented with @defer block using various triggers such as viewport entry, user interactions, and timers. Additionally, we enhanced user experience by using @placeholder and @loading blocks to effectively manage UI elements during load times.
- Starting point: https://github.com/danywalls/learn-defer-views-angular
- Dynamic Imports https://github.com/danywalls/learn-defer-views-angular/tree/dynamic-imports
- Defer views https://github.com/danywalls/learn-defer-views-angular/tree/feature/defer-views